
From June 2025, all Apple Accounts (aka Apple IDs) registered with a Mirait email address ([email protected]) will be asked to transfer to a company managed account or convert to a personal account.
If you transfer to a company managed account, then the Apple Account will stay the same and Mirait will manage all the associated Apps and data.
If you convert to a personal account, you'll need to provide a personal email address and you will manage all the associated Apps and data.
This process will apply to ALL Apple Accounts using Mirait email addresses regardless of whether the device is personal or company issued.
You will receive an email and notification on your device informing you of the need to transfer or convert the Apple Account.

The email and notification present two options to the user:
- Transfer the personal Apple Account and its data to the organization, which then converts it into a Managed Apple Account.
- Choose a new primary email address to continue using their personal Apple Account.

The process below applies to the first option.
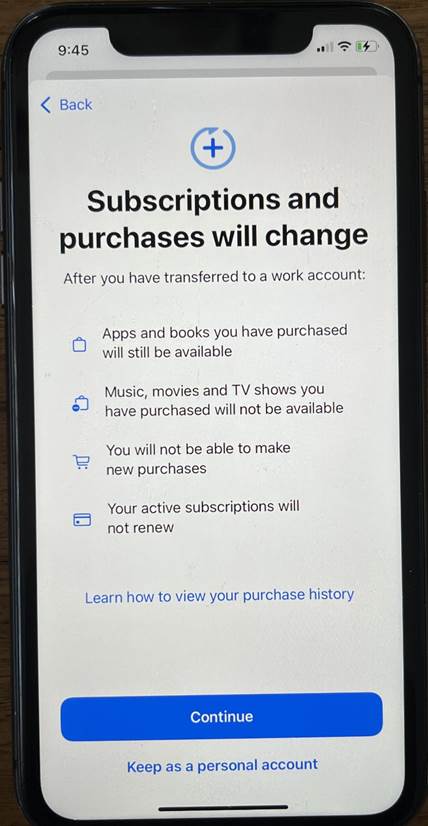
Select "Transfer to a work account", then click "Continue" and follow the prompts as shown below.
Select “Transfer and Sign Out”

Enter your Passcode.

Enter your Apple password to turn off “Find My iPhone” feature, then press “Done”

In the next step, you will see the following confirmation once the account has been transferred.

Troubleshooting:
If the user is notified that they must make changes to transfer their personal Apple Account, a red notification will appear as shown below.

Tap on “Transfer to a work account” option to go to the next step.
Please action the issue depending on the change required. In this case, it is required to delete Health Data from iCloud.

To delete Health Data from iCloud, follow the steps below.
Settings > iCloud > Saved to iCloud (See All) > Health > Manage Storage > Delete Data from iCloud
Select “Disable and Delete”

